Bitbucket Pipelines II
On my previous post I created a project on BitBucket and defined a basic pipeline to run some tests on the code. This pipelines ran on BitBucket’s servers on the cloud, that could be fine for most projects, where you only want to build a container image and push it to hub.docker.com.
But this wouldn’t work in scenarios where the image should be push to a private registry or, if you want to use the pipeline to deploy your code to servers on a private network, as for instance, a home lab.
Configuring runners
A BitBucket runner allows you to run your pipelines in your own environment, it’s a container with access to the docker socket and docker directory which can spin up other containers to run the pipeline. It uses a pull strategy to query bitbucket for new tasks, so it’s not necessary to open any incoming port.
For setting up runners, I first went to the “Workspace Settings” clicking on my name, then on “Settings”, and finally, at the bottom of the left side menu, I clicked on “Workspace Runners”, then the landing page appeared indicating I hadn’t any runner installed. A workspace runner is the same for all your projects in the same workspace and a project runner is only for a project, which is better, it depends on your projects.
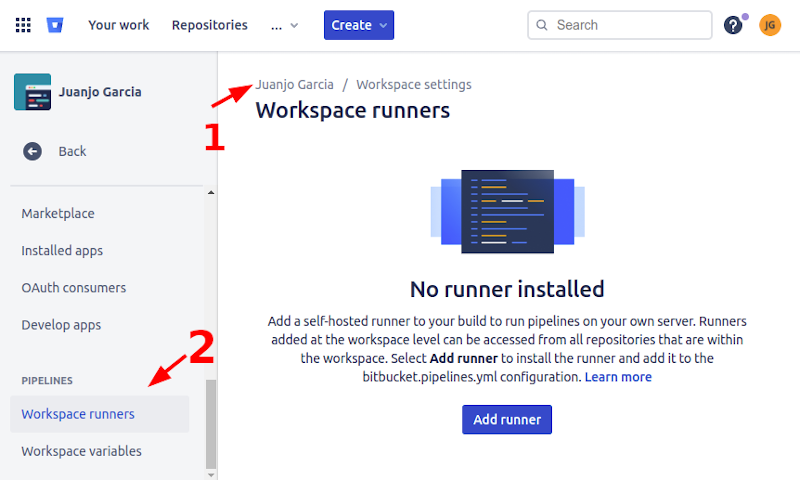
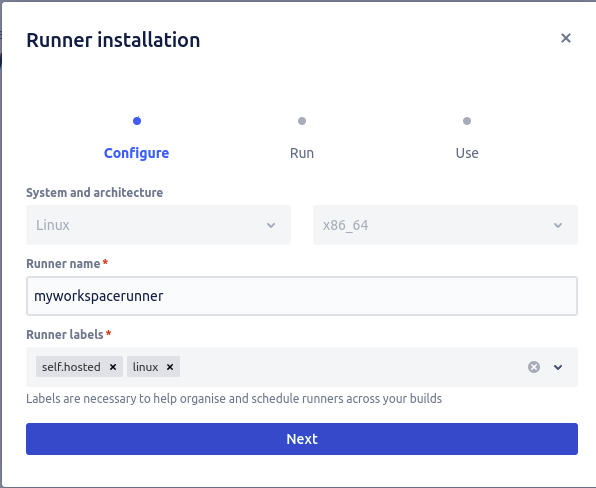
After clicking on the blue “Add runner” button a configuration wizard popped out. The first form was pretty simple: OS and architecture, name and a tag list. If you plan to have several runners, for instance one on each environment (DEV/PRE/PRO), you can use tags to differentiate them.
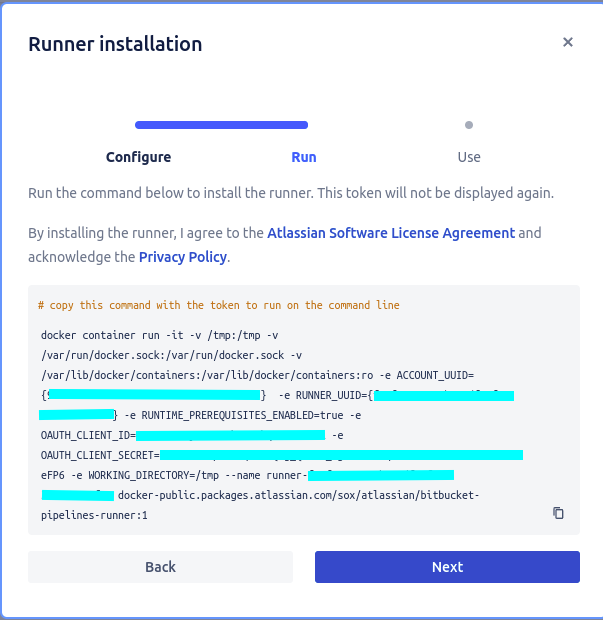
The second step from the wizard displayed the command I should run to deploy the runner in my docker host. Be aware that command will have access to your docker sock, and thus, run everything it wants, so it’s advised to run it on a dedicated host.
The wizard’s third screen displayed an example about what to include on the pipeline definition to execute it on my local runner.

In my case, I had two vms at my pc running a docker swarm, and I want to deploy my script a service on it, I created a simple ansible playbook for that, and I updated my bitbucket-pipelines.yml with the following step:
    - step:
        name: Ansible deployment
        image: python:3.8
        deployment: production
        runs-on:
          - self.hosted
          - linux
        script:
          - pip install ansible jsondiff
          - ANSIBLE_CONFIG=$PWD/ansible.cfg ansible-playbook site.yml
        services:
          - docker
Once commited and pushed, I saw some containers spinning up:

On the repository’s pipelines section I was able to access the details about pipeline execution and also the logs of every step.
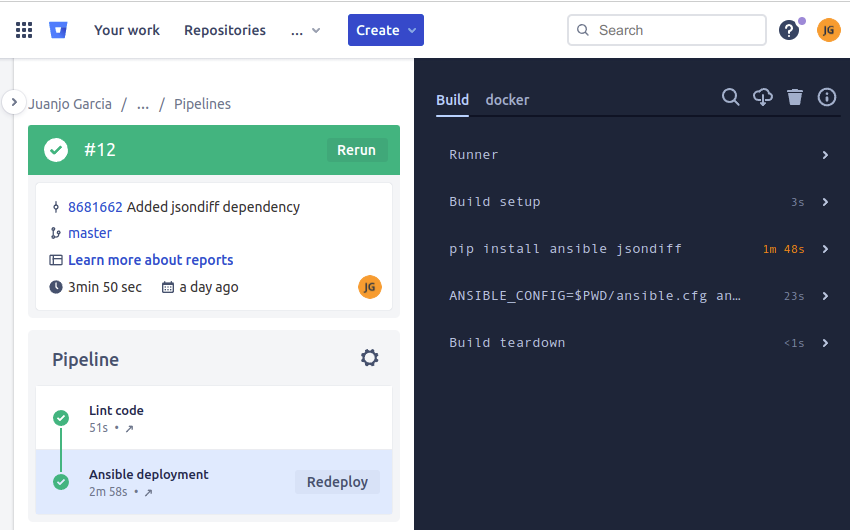
Note that in my case, most of the time was consumed by packages installed by pip, that happened because ansible package had several dependencies to include, but I made it on purpose, so it can be improved, for example using an ansible public image or using one of our own from a private repository.
Note also that, in order to run ansible playbooks, the runner had to have access to the destination servers through ssh, so a private key is needed. The SSH Keys repository setting helped me on that, I copied there a private and public key pair I had previously configured on the servers, and it was automatically installed on my runner.
I used ansible configuration to prevent unknown server host keys of making the playbook fail. As the files were inside a world writable directory on the runner, ansible didn’t automatically pick my ansible.cfg file from that directory for security reasons, that’s why I used the environment variable to force ansible to load its configuration from that file.
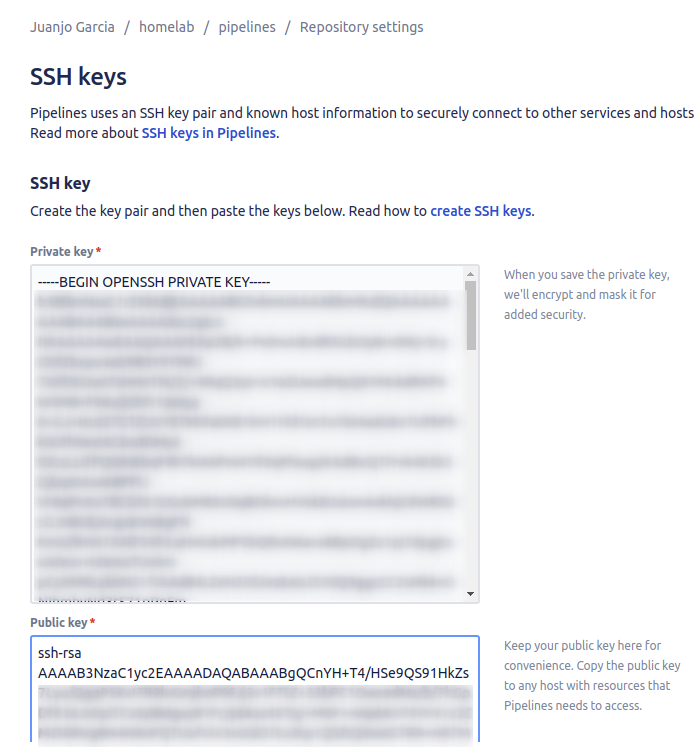
Once the key is saved, you can’t recover it, only the runners will have access to it. So it is safe, at least, from prying eyes.
Conclusions
Bitbucket made using private runners a piece of cake, only a host capable of running docker containers and with internet access is required. This is a very easy solution compared with jenkins agents nodes which were accessed from jenkins, thus requiring allowing incoming connections.
The next step will be using custom images on private repositories as build environments.
The code is available here on bitbucket.