Keycloak Demo on Minikube
In this blog post I’ll cover how to deploy a basic keycloak and a demo application that uses the OpenId Connect protocol to authenticate users against keycloak.
Setup a minikube cluster
To setup the minikube cluster we’re going to follow the steps of the previous post but extending it to use cert-manager.
For the next step, you’ll need easyrsa installed, go to https://github.com/OpenVPN/easy-rsa
and follow the instructions for you operating system. Once installed, run the following
commands to create a Certificate Authority.
easyrsa init-pki
EASYRSA_BATCH=1 EASYRSA_REQ_CN="Minikube" easyrsa build-ca nopass
It will create a folder structure like this one:
pki
├── ca.crt
├── certs_by_serial
├── index.txt
├── index.txt.attr
├── inline
├── issued
├── openssl-easyrsa.cnf
├── private
│   └── ca.key
├── reqs
├── revoked
│   ├── certs_by_serial
│   ├── private_by_serial
│   └── reqs_by_serial
└── serial
Then create a secret containing the certificate and the key.
kubectl -n kube-system create secret tls minikube-ca \
  --cert pki/ca.crt --key pki/private/ca.key
If you don’t already have the jetstack repo, configure it
helm repo add jetstack https://charts.jetstack.io
Then install cert-manager
helm install -n kube-system certmanager jetstack/cert-manager \
  --set crds.enabled=true
Once the installation is complete, create a cluster issue which uses the created Certificate Authority.
cat <<EOF | kubectl apply -n kube-system -f -
apiVersion: cert-manager.io/v1
kind: ClusterIssuer
metadata:
  name: minikube-ca
spec:
  ca:
    secretName: minikube-ca
EOF
Also, configure the internal DNS to resolve the minikube domain. For doing
that, you’ll need to know your minikube’s IP address.
minikube ip
Then update the DNS config map to point the minikube domain to that ip using:
kubectl edit configmap coredns -n kube-system
In my case I added:
minikube:53 {
    errors
    cache 30
    forward . 192.168.67.2
}
Then follow the instructions on the Ingres DNS minikube to setup your system to look for .minikube urls in minikube.
In my case, I used ip route get $(minikube ip) to find out the interface
associated to minikube, it returned:
192.168.49.2 dev br-dbd47685f7b8 src 192.168.49.1 uid 1000
    cache
So my interface was br-dbd47685f7b8.
Then I configured resolved to use the minikube dns to resolve the .minikube domain.
sudo resolvectl domain br-dbd47685f7b8 "~minikube"
sudo resolvectl dns br-dbd47685f7b8 $(minikube ip)
Install keycloak
There are two options here, if following the instructions from the previous post you’ve created a database instance, you can use it.
Log into the pod shell using kubectl or the YAKD dashboard to create a database and an user for keycloak.
CREATE USER keycloak WITH ENCRYPTED PASSWORD 'changeme';
ALTER ROLE keycloak WITH login createdb;
CREATE DATABASE keycloak WITH OWNER keycloak;

In the official getting started kubernetes guide, the manifest file includes a postgres instance. But I prefer to use the database managed by the operator, like in a production cluster.
So I stripped the postgres part from the official manifest
# keycloak.yaml
apiVersion: v1
kind: Service
metadata:
  name: keycloak
  labels:
    app: keycloak
spec:
  ports:
    - protocol: TCP
      port: 8080
      targetPort: http
      name: http
  selector:
    app: keycloak
  type: ClusterIP
---
apiVersion: v1
kind: Service
metadata:
  labels:
    app: keycloak
  # Used to
  name: keycloak-discovery
spec:
  selector:
    app: keycloak
  # Allow not-yet-ready Pods to be visible to ensure the forming of a cluster if Pods come up concurrently
  publishNotReadyAddresses: true
  clusterIP: None
  type: ClusterIP
---
apiVersion: apps/v1
# Use a stateful setup to ensure that for a rolling update Pods are restarted with a rolling strategy one-by-one.
# This prevents losing in-memory information stored redundantly in two Pods.
kind: StatefulSet
metadata:
  name: keycloak
  labels:
    app: keycloak
spec:
  serviceName: keycloak-discovery
  # Run with one replica to save resources, or with two replicas to allow for rolling updates for configuration changes
  replicas: 2
  selector:
    matchLabels:
      app: keycloak
  template:
    metadata:
      labels:
        app: keycloak
    spec:
      containers:
        - name: keycloak
          image: quay.io/keycloak/keycloak:26.3.1
          args: ["start"]
          env:
            - name: KC_BOOTSTRAP_ADMIN_USERNAME
              value: "admin"
            - name: KC_BOOTSTRAP_ADMIN_PASSWORD
              value: "admin"
            # In a production environment, add a TLS certificate to Keycloak to either end-to-end encrypt the traffic between
            # the client or Keycloak, or to encrypt the traffic between your proxy and Keycloak.
            # Respect the proxy headers forwarded by the reverse proxy
            # In a production environment, verify which proxy type you are using, and restrict access to Keycloak
            # from other sources than your proxy if you continue to use proxy headers.
            - name: KC_PROXY_HEADERS
              value: "xforwarded"
            - name: KC_HTTP_ENABLED
              value: "true"
            # In this explorative setup, no strict hostname is set.
            # For production environments, set a hostname for a secure setup.
            - name: KC_HOSTNAME_STRICT
              value: "false"
            - name: KC_HEALTH_ENABLED
              value: "true"
            - name: 'KC_CACHE'
              value: 'ispn'
            # Use the Kubernetes configuration for distributed caches which is based on DNS
            - name: 'KC_CACHE_STACK'
              value: 'kubernetes'
            # Passing the Pod's IP primary address to the JGroups clustering as this is required in IPv6 only setups
            - name: POD_IP
              valueFrom:
                fieldRef:
                  fieldPath: status.podIP
            # Instruct JGroups which DNS hostname to use to discover other Keycloak nodes
            # Needs to be unique for each Keycloak cluster
            - name: JAVA_OPTS_APPEND
              value: '-Djgroups.dns.query="keycloak-discovery" -Djgroups.bind.address=$(POD_IP)'
              value: '-Djgroups.dns.query="keycloak-discovery" -Djgroups.bind.address=$(POD_IP)'
            - name: 'KC_DB_URL_DATABASE'
              value: 'keycloak'
            - name: 'KC_DB_URL_HOST'
              value: 'database.postgres.svc.cluster.local'
            - name: 'KC_DB'
              value: 'postgres'
            # In a production environment, use a secret to store username and password to the database
            - name: 'KC_DB_PASSWORD'
              valueFrom:
                secretKeyRef:
                  name: keycloak
                  key: KC_DB_PASSWORD
            - name: 'KC_DB_USERNAME'
              valueFrom:
                secretKeyRef:
                  name: keycloak
                  key: KC_DB_USERNAME
          ports:
            - name: http
              containerPort: 8080
          startupProbe:
            httpGet:
              path: /health/started
              port: 9000
            periodSeconds: 1
            failureThreshold: 600
          readinessProbe:
            httpGet:
              path: /health/ready
              port: 9000
            periodSeconds: 10
            failureThreshold: 3
          livenessProbe:
            httpGet:
              path: /health/live
              port: 9000
            periodSeconds: 10
            failureThreshold: 3
          resources:
            limits:
              cpu: 2000m
              memory: 2000Mi
            requests:
              cpu: 500m
              memory: 1700Mi
The file can be found also in my homelab repo
Before deploying keycloak, is necessary to create the namespace and a secret to store the database credentials:
kubectl create ns keycloak
kubectl -n keycloak create secret generic keycloak \
  --from-literal KC_DB_USERNAME=keycloak \
  --from-literal KC_DB_PASSWORD=changeme
Once the secret is created, deploy the manifest:
kubectl -n keycloak apply -f keycloak.yaml
Now, in order to access it, we need to create a ingress.
#keycloak-ingress.yaml
apiVersion: networking.k8s.io/v1
kind: Ingress
metadata:
  name: keycloak
  namespace: keycloak
  annotations:
    cert-manager.io/cluster-issuer: "minikube-ca"
spec:
  ingressClassName: nginx
  tls:
    - hosts:
        - keycloak.minikube
      secretName: keycloak.tls
  rules:
    - host: keycloak.minikube
      http:
        paths:
          - path: /
            pathType: Prefix
            backend:
              service:
                name: keycloak
                port:
                  number: 8080
Here, we use the annotation cert-manager.io/cluster-issuer: "minikube-ca"
to ask certmanager to create a certificate for the ingress.
Deploy it running:
kubectl -n keycloak -f keycloak-ingress.yaml
Now, you can visit https://keycloak.minikube/admin and you’ll see the login screen:

If you didn’t install the ca.crt certificate created with easyrsa in your trust store, you’ll get a security warning.
The default credentials are admin:admin.
Congratulations, you have a keycloak instance running.
Create a realm
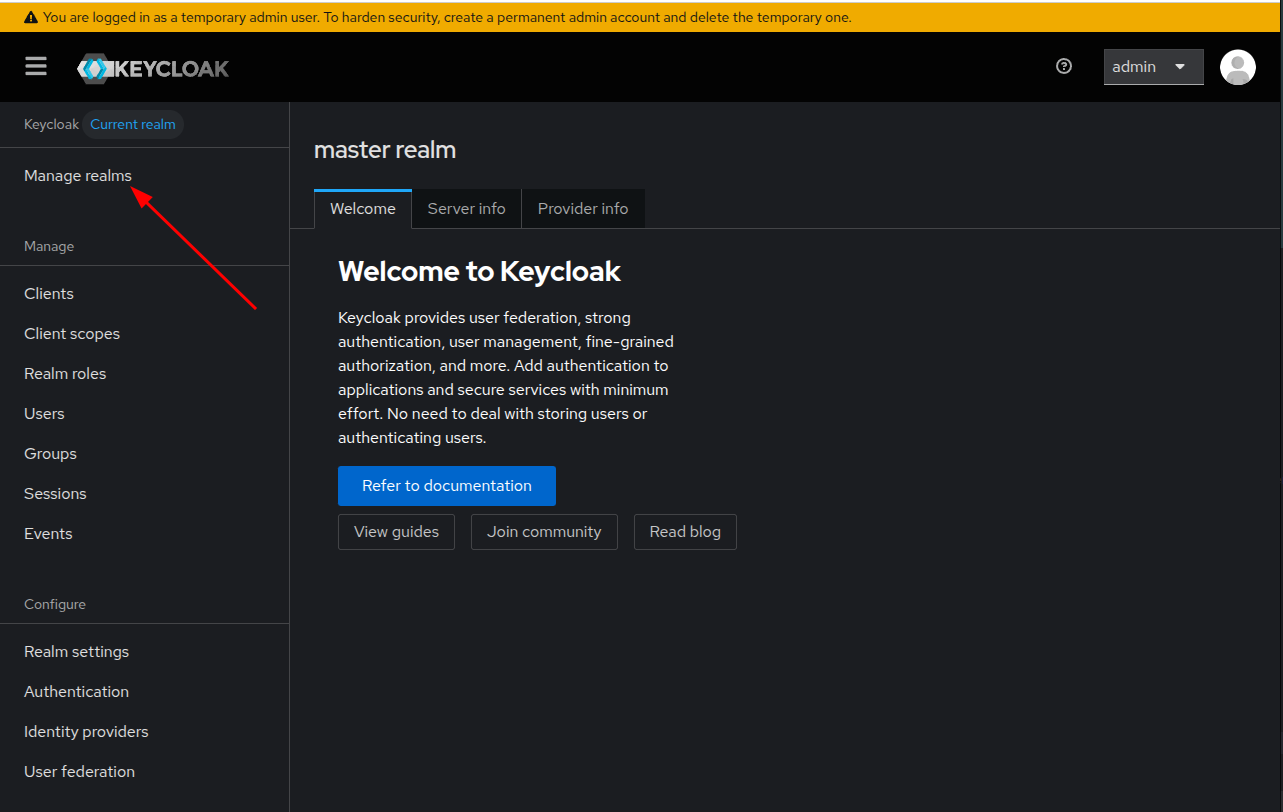
Once you’ve logged in, click on the manage realms entry on the left menu bar.
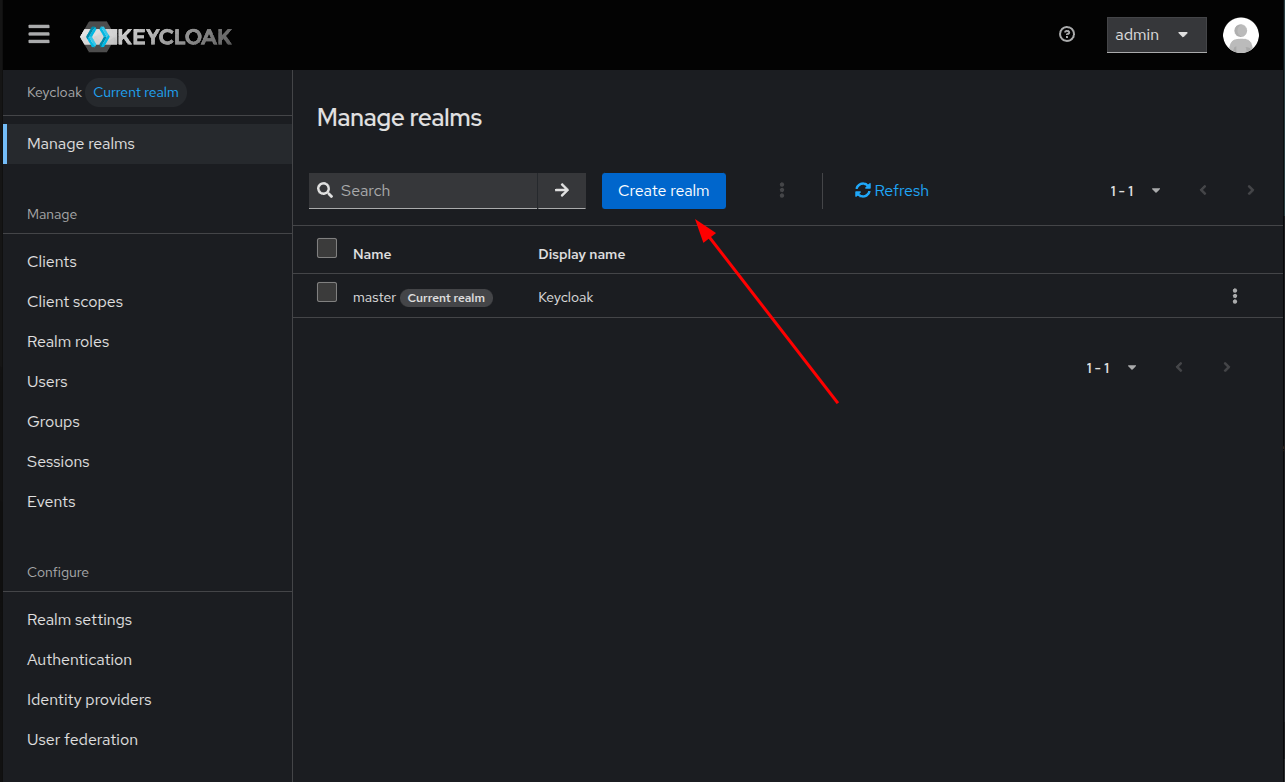
 Once the realms list is displayed, click on the Create realm button.
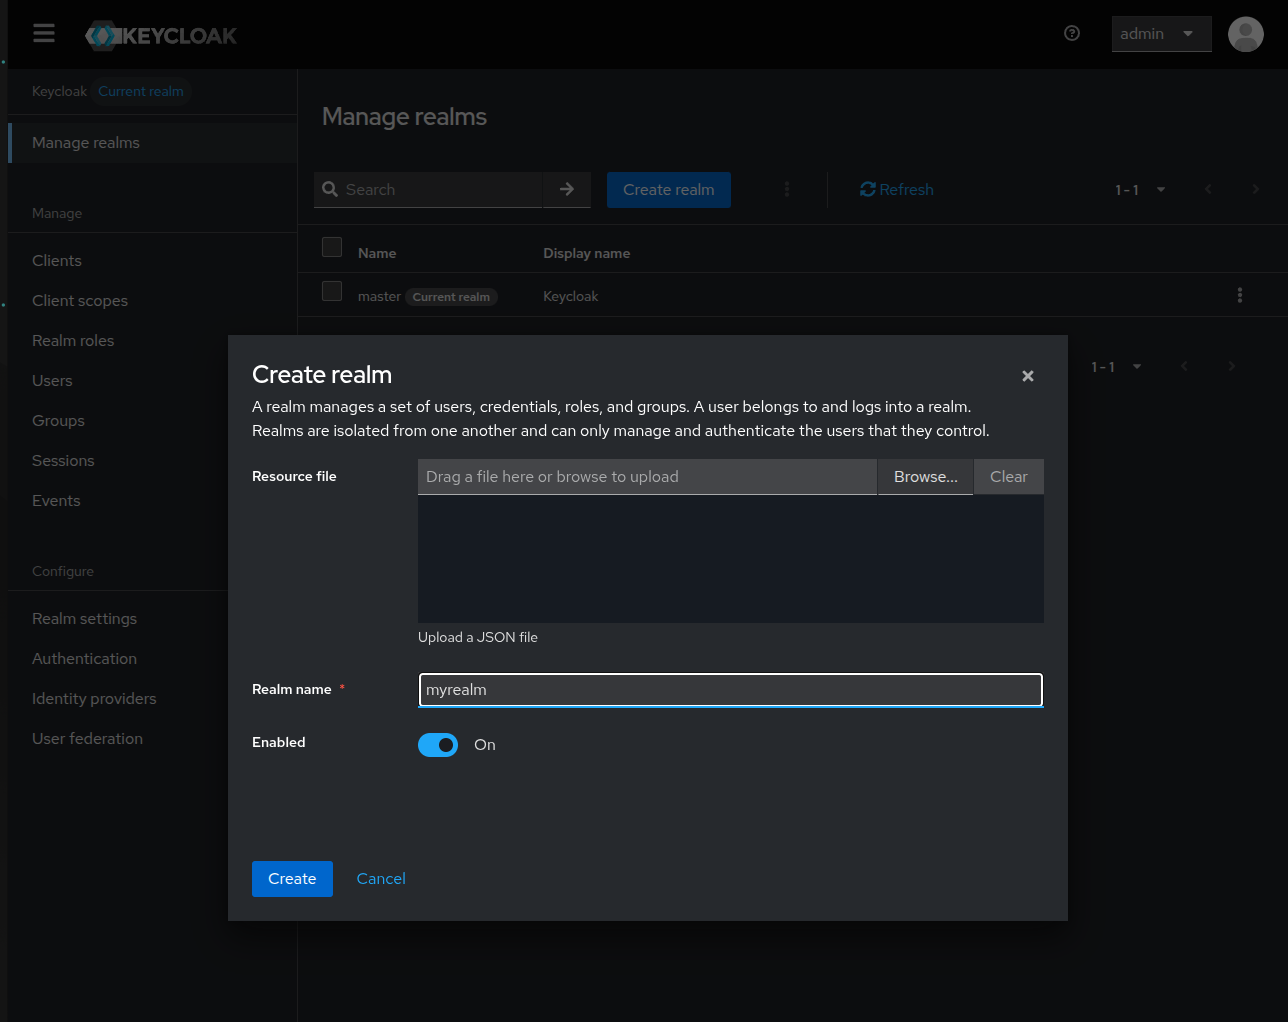
 A pop up window will show, give it a name like myrealm and click Create.
You can choose any other realm name, but then you’ll need to adapt the following examples.
A pop up window will show, give it a name like myrealm and click Create.
You can choose any other realm name, but then you’ll need to adapt the following examples.
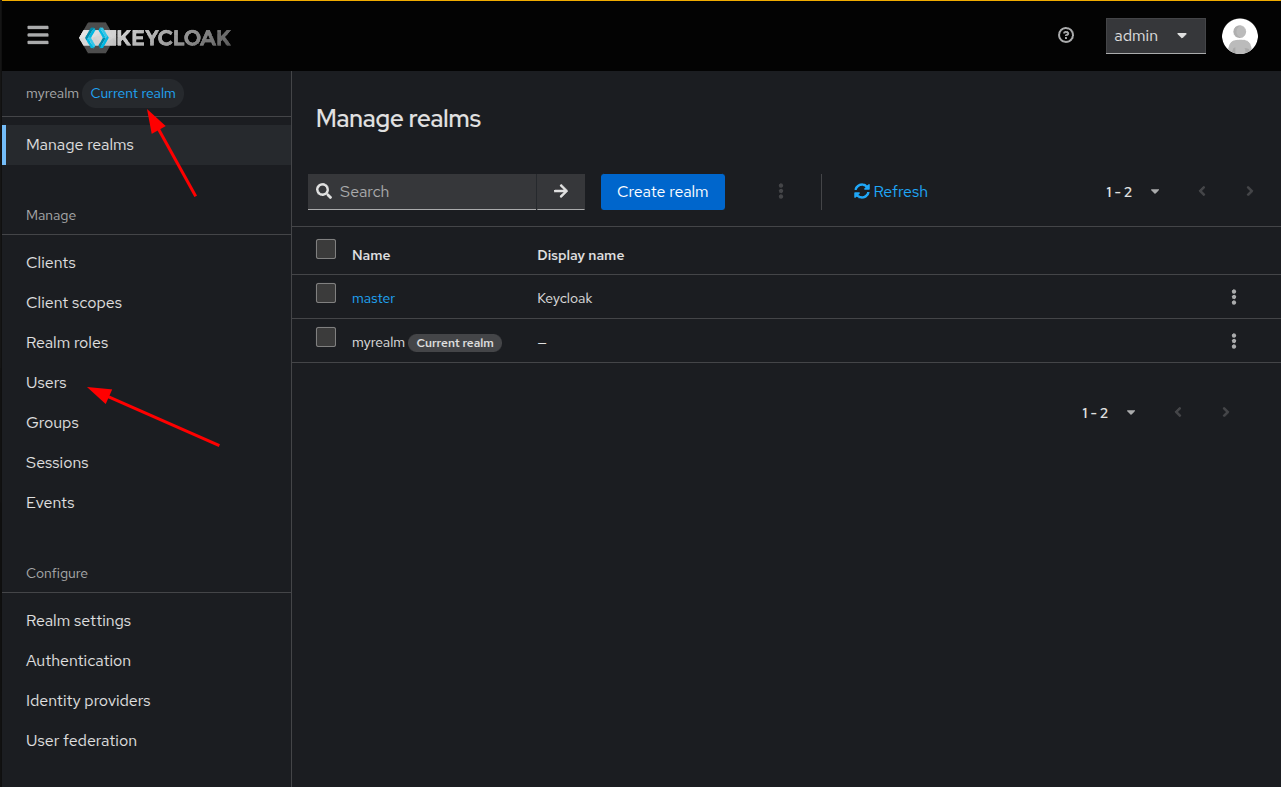
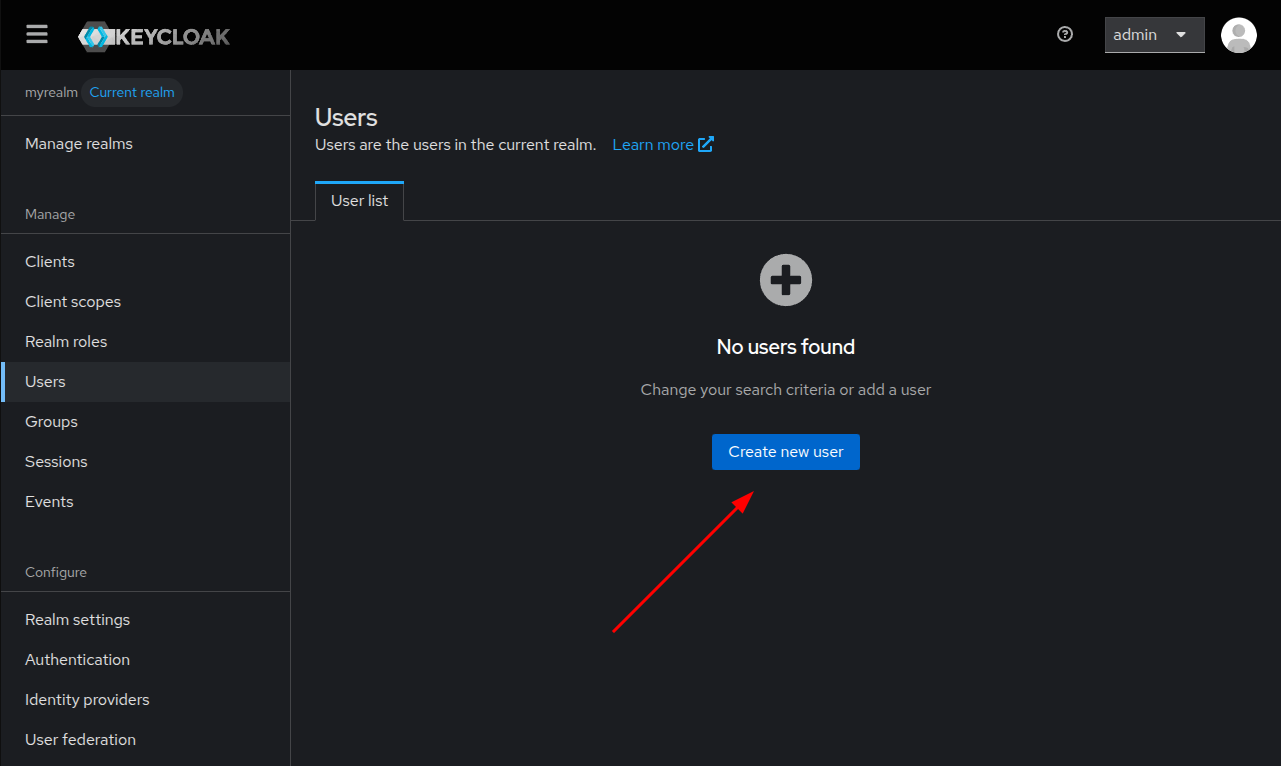
 Now, we’re going to create a new user in that realm. Ensure the new realm is the
Current realm and clic on Users.
Now, we’re going to create a new user in that realm. Ensure the new realm is the
Current realm and clic on Users.
 In the user list, click on the Create new user button.
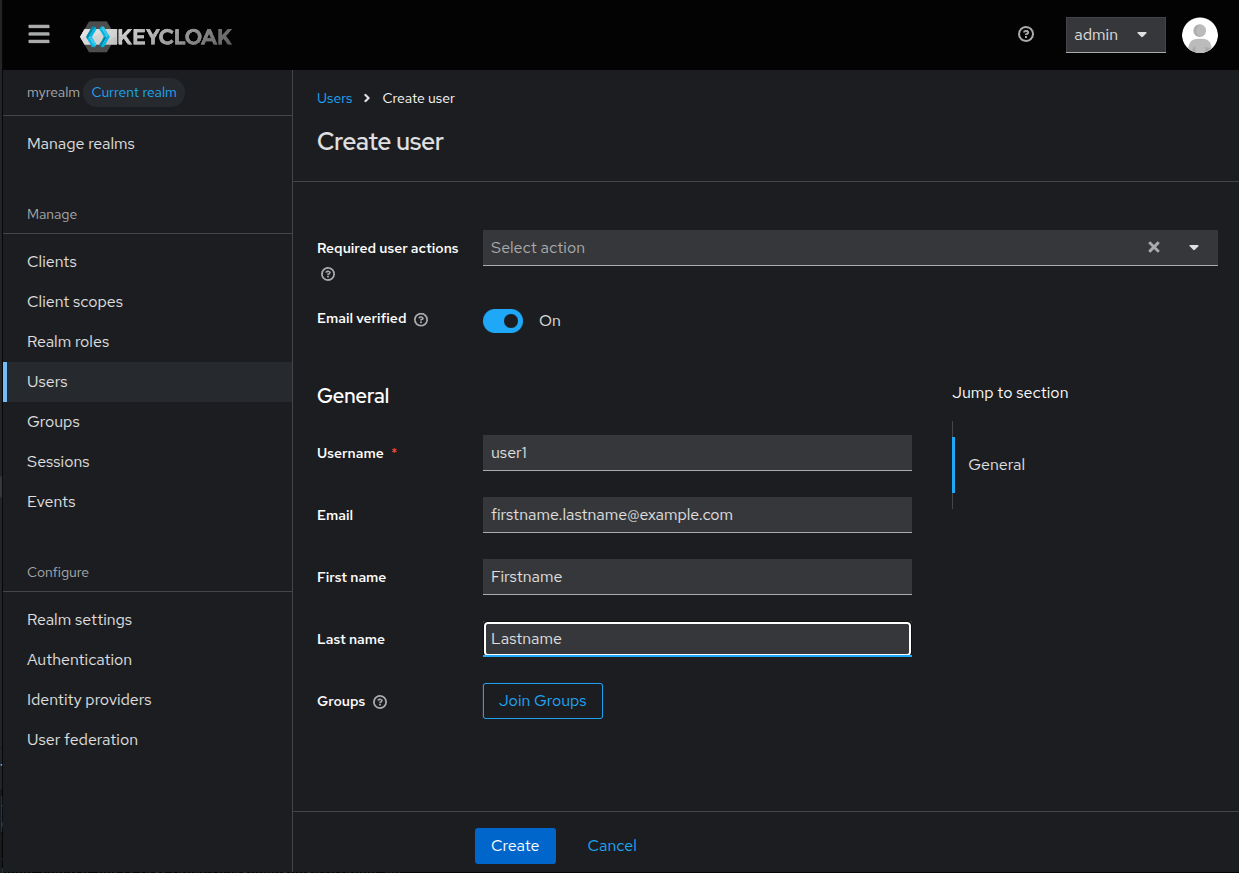
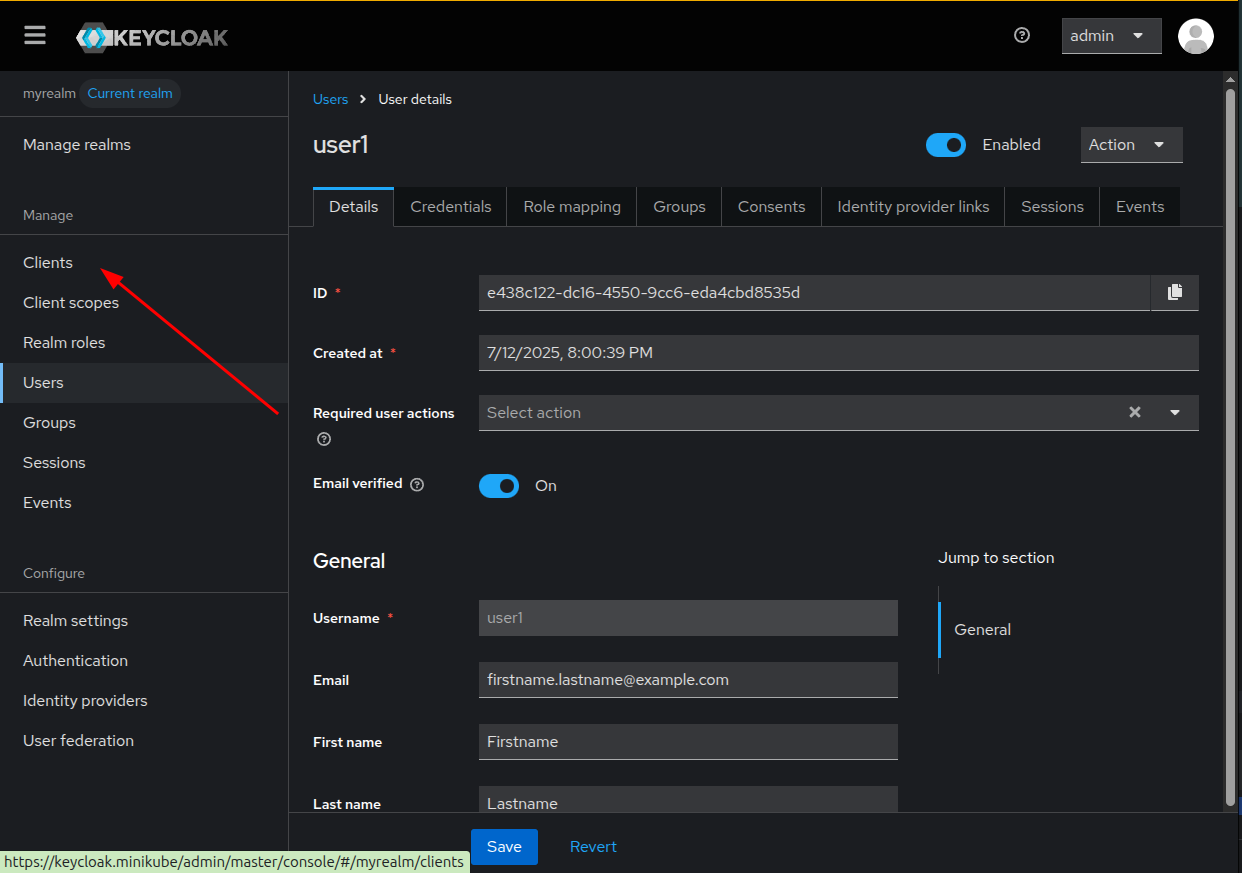
 Fill up the fields and don’t forget to enable the Email verified switch,
as we haven’t set up the mail server, we cannot send the verification emails.
Click on the Create button to create the user.
Fill up the fields and don’t forget to enable the Email verified switch,
as we haven’t set up the mail server, we cannot send the verification emails.
Click on the Create button to create the user.
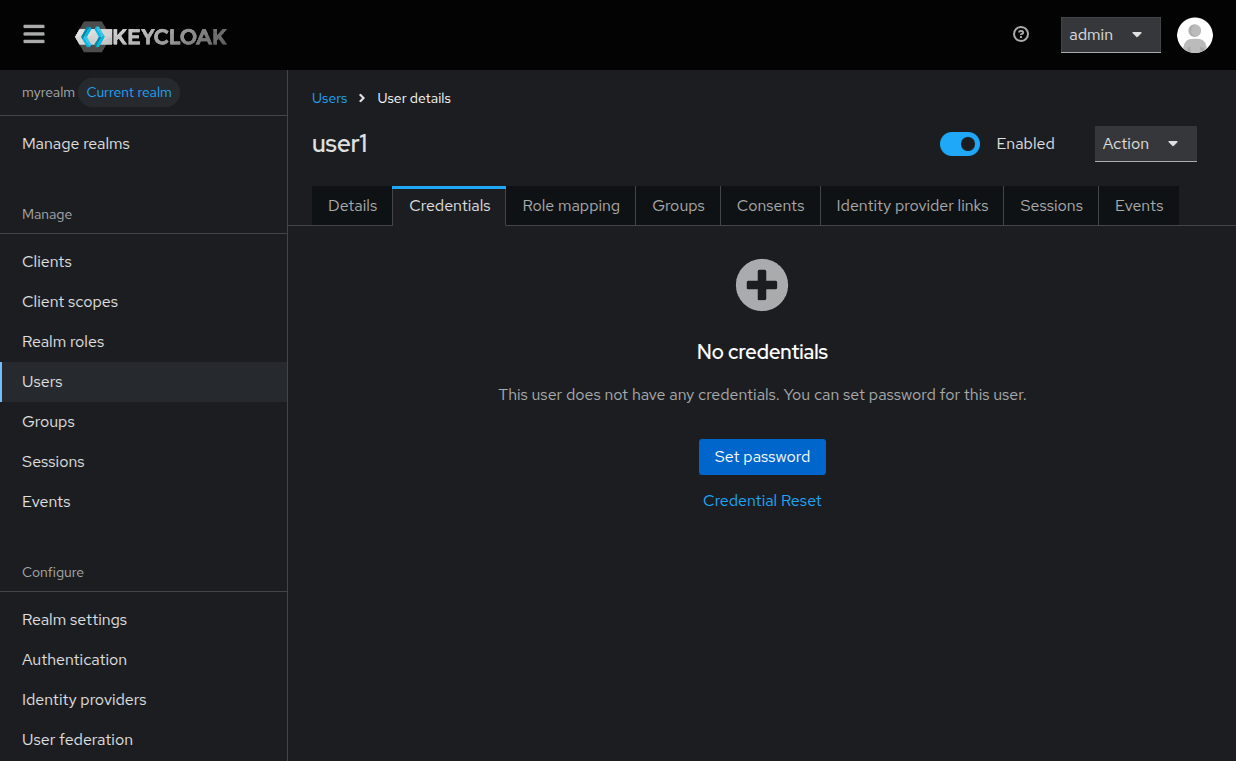
 The next step is to provide credentials for the created user, to do so, go to the
Credentials and click on the Set password button.
The next step is to provide credentials for the created user, to do so, go to the
Credentials and click on the Set password button.
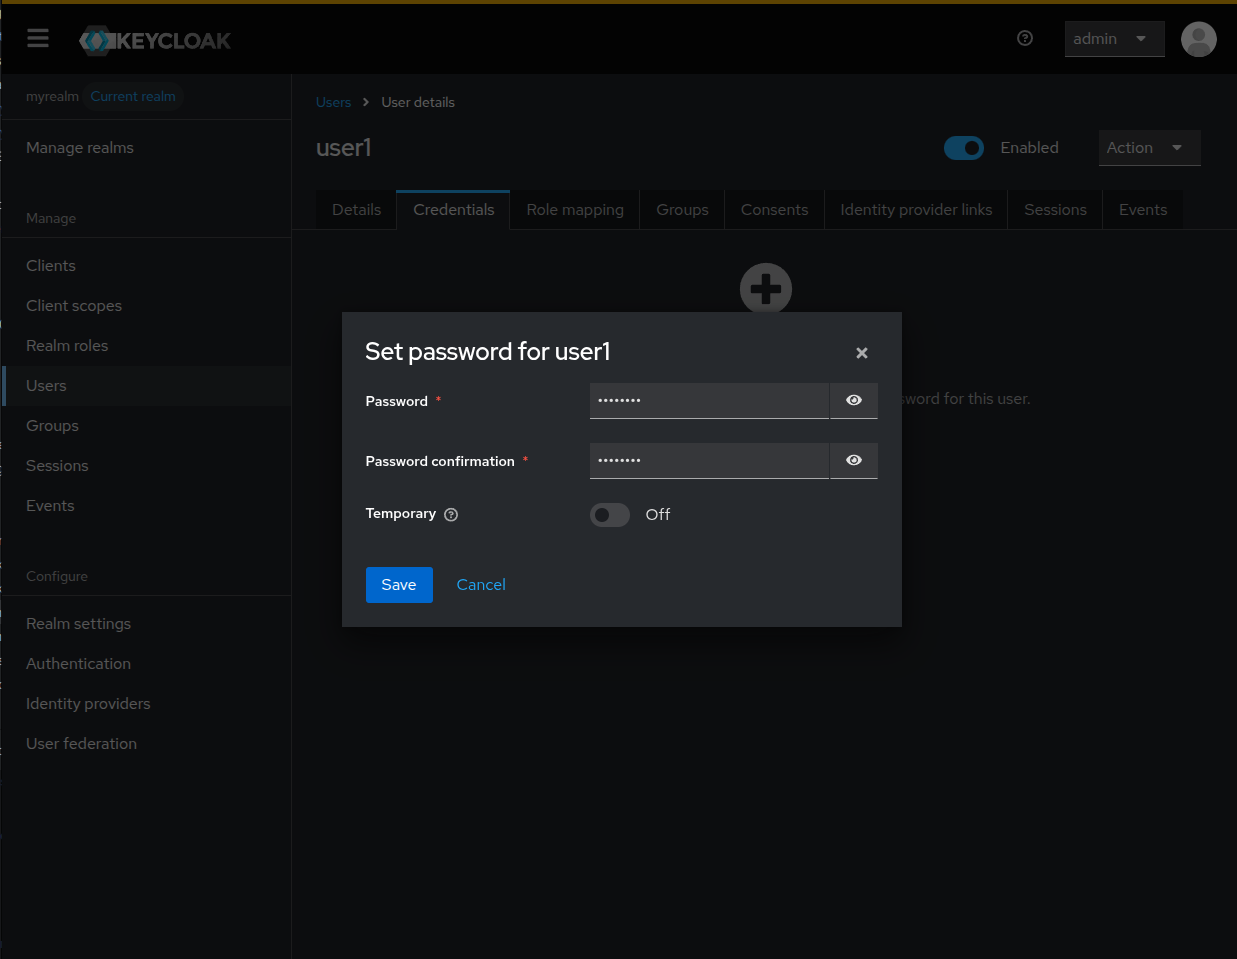
 Set the password and the confirmation and switch off the Temporary switch to
prevent the user to be asked to change his password, and click Save.
Set the password and the confirmation and switch off the Temporary switch to
prevent the user to be asked to change his password, and click Save.
 Now, we’re going to create an OpenID connect so an application can use keycloak
to identify their users. Click on the Clients entry in the left menu.
Now, we’re going to create an OpenID connect so an application can use keycloak
to identify their users. Click on the Clients entry in the left menu.
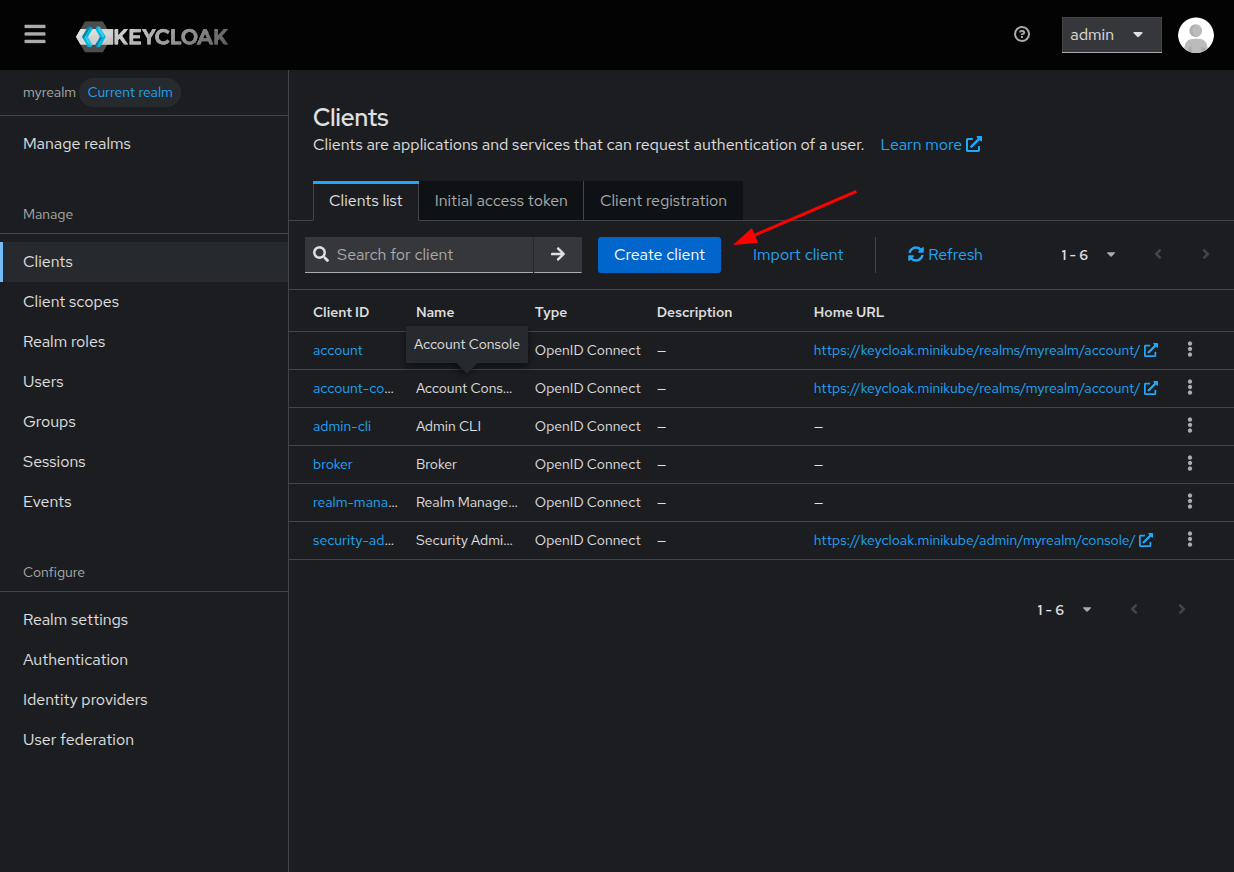
 Keycloak has some default clients for each domain, like the account one,
where users can view or edit their account information.
Keycloak has some default clients for each domain, like the account one,
where users can view or edit their account information.
Click on Create client to start the client creation wizard.
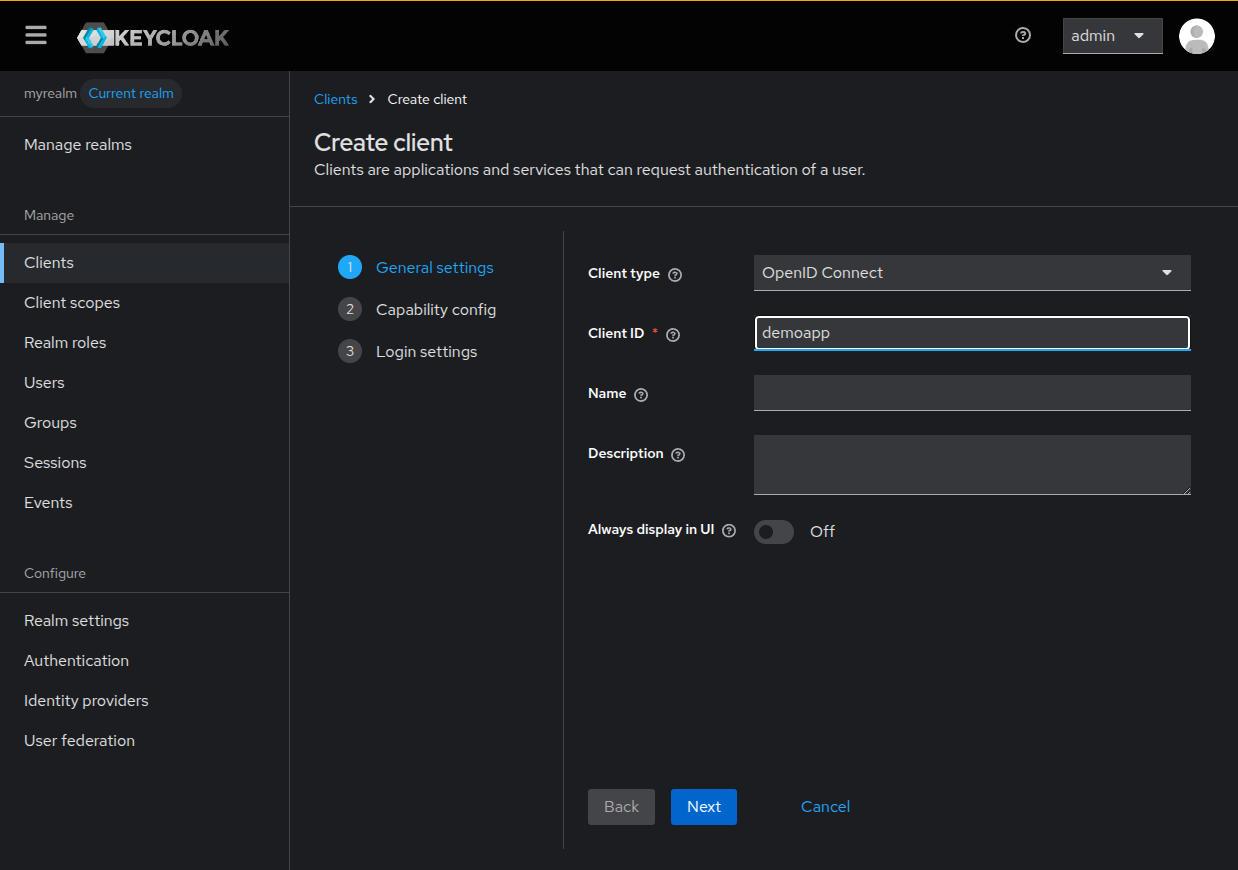
 In the first step of the wizard, select OpenID Connect as Client type and
give it a Client ID, in this example demoapp, and click Next.
In the first step of the wizard, select OpenID Connect as Client type and
give it a Client ID, in this example demoapp, and click Next.
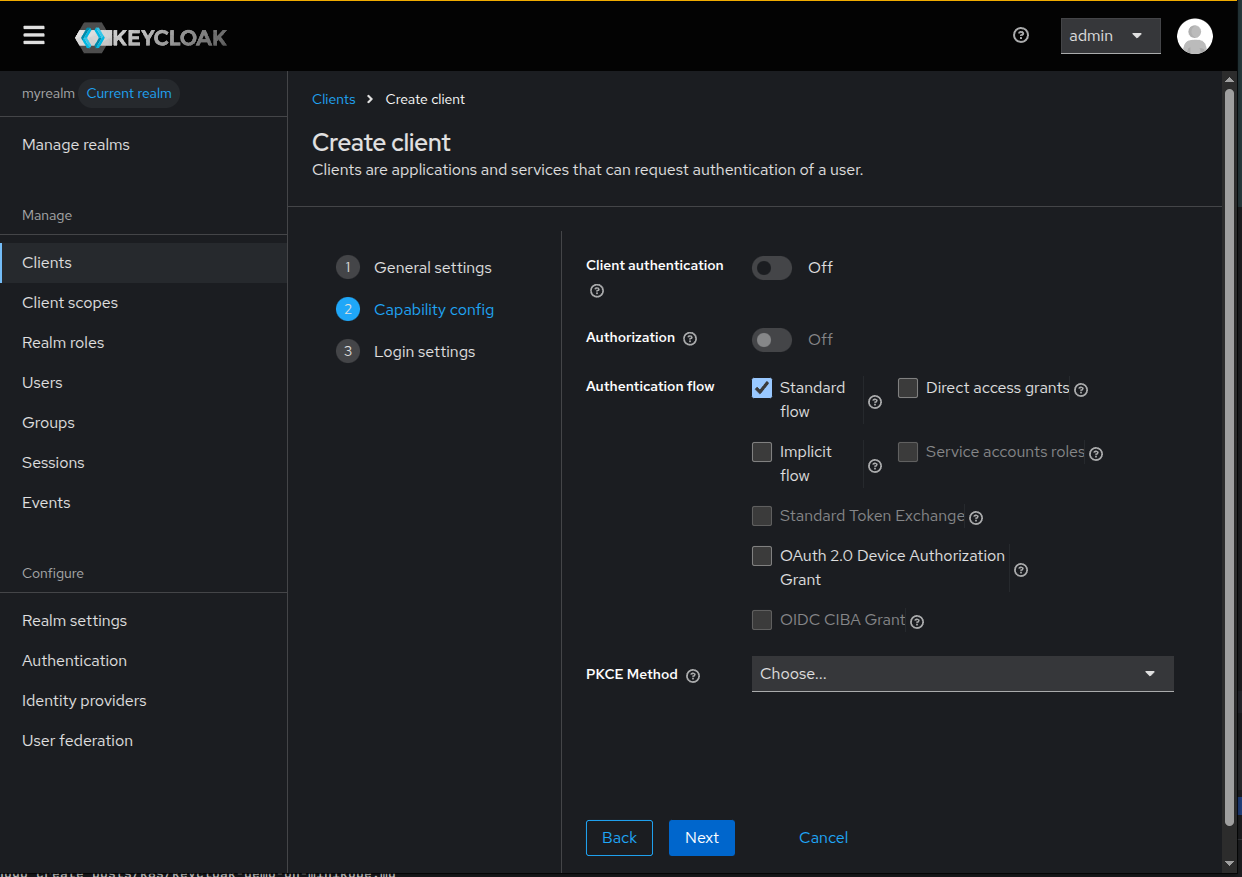
 In the second step of the wizard, ensure Standard flow is selected in the
Authorization flow section.
In the second step of the wizard, ensure Standard flow is selected in the
Authorization flow section.
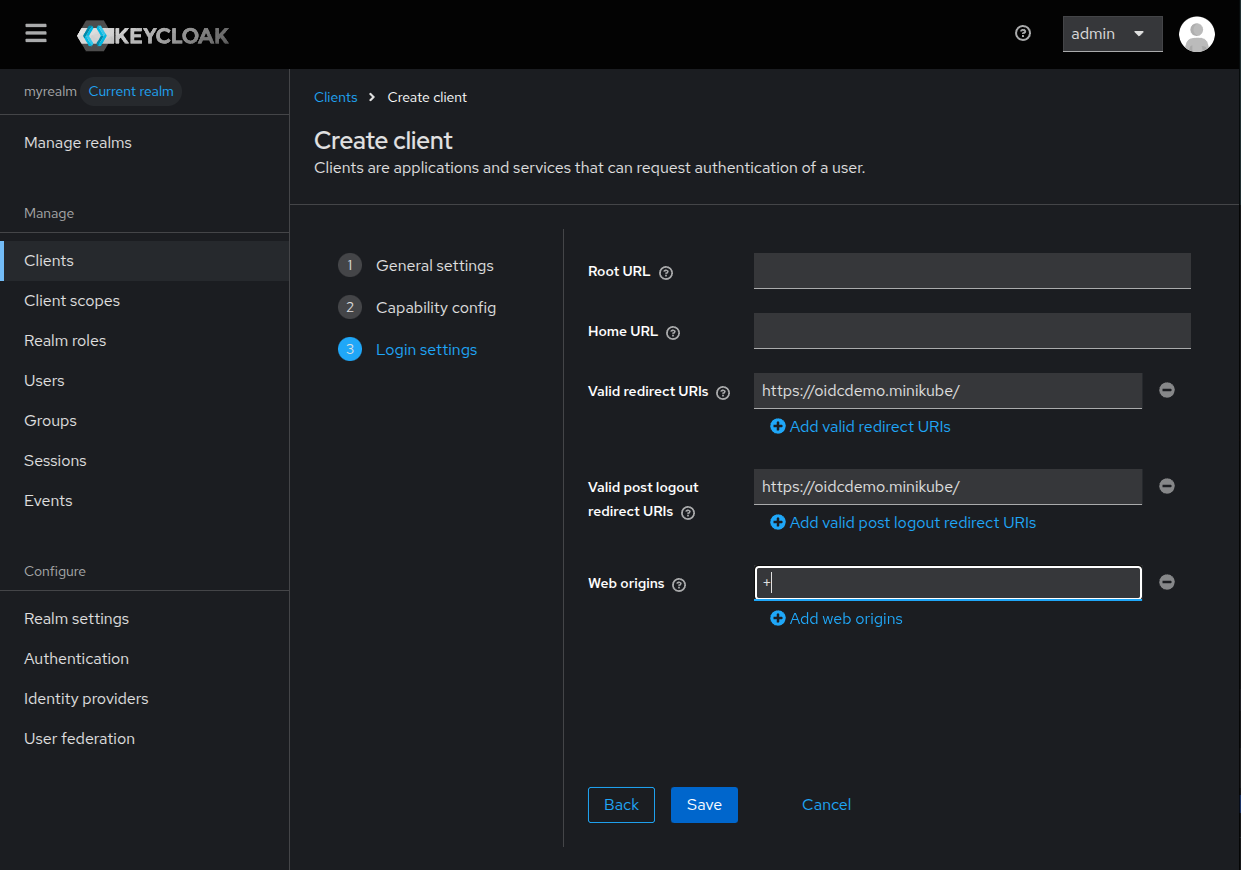
 In the last step we’re going to setup the urls of our web application, this will
ensure that only allowed applications use the configured client.
In the last step we’re going to setup the urls of our web application, this will
ensure that only allowed applications use the configured client.
In the field Web origins is advised to set the + (plus sign), that will allow all the domains configured in the redirect URIs in the CORS headers. Alternatively, you can manually set the allowed origins for the CORS headers.
Click Save to finish client configuration.
We have or OpenID Connect client configuration set, we can deploy our demo client.
Deploy an OIDC enabled application
To test the functionality of keycloak we’re going to deploy a demo client. For this I’m going to use an old Angular based OIDC client that I don’t remember from where I got it, credit to its author.
The manifest for the deployment is:
apiVersion: apps/v1
kind: Deployment
metadata:
  labels:
    app: oidcdemo
  name: oidcdemo
  namespace: keycloak
spec:
  replicas: 1
  selector:
    matchLabels:
      app: oidcdemo
  template:
    metadata:
      labels:
        app: oidcdemo
    spec:
      containers:
      - image: docker.io/juanjovlc2/oidcdemo:latest
        name: oidcdemo
        ports:
        - containerPort: 8080
          name: http
        volumeMounts:
          - name: tmpdir
            mountPath: /run
          - name: clientconfig
            mountPath: /usr/share/nginx/html/assets/
      volumes:
        - name: tmpdir
          emptyDir: {}
        - name: clientconfig
          configMap:
            name: clientconfig
---
apiVersion: v1
kind: Service
metadata:
  name: oidcdemo
  namespace: keycloak
spec:
  type: ClusterIP
  selector:
    app: oidcdemo
  ports:
    - name: http
      port: 8080
      targetPort: http
But the magic is on the configmap which stores the client configuration:
apiVersion: v1
kind: ConfigMap
metadata:
  name: clientconfig
  namespace: keycloak
data:
  auth.clientConfiguration.json: |
    {
      "stsServer": "https://keycloak.minikube/realms/myrealm",
      "redirect_url": "https://oidcdemo.minikube/",
      "client_id": "demoapp",
      "pres_req_conf_id": "verified-email",
      "response_type": "code",
      "scope": "openid profile",
      "post_logout_redirect_uri": "https://oidcdemo.minikube/",
      "start_checksession": true,
      "silent_renew": true,
      "silent_renew_url": "http://oidcdemo.minikube/silent-renew.html",
      "post_login_route": "/home",
      "forbidden_route": "/home",
      "unauthorized_route": "/home",
      "log_console_warning_active": true,
      "log_console_debug_active": true,
      "max_id_token_iat_offset_allowed_in_seconds": 10,
      "auto_userinfo": false
    }
The most relevant settings here are:
- stsServer: The url for the realm where the client is defined.
- redirect_url: The url to be redirected after the login, must match one of the configured in the client.
- client_id: Here we must set the client_id configured in the client.
And, to access the demo application, we should set an ingress:
apiVersion: networking.k8s.io/v1
kind: Ingress
metadata:
  name: oidcdemo
  namespace: keycloak
  annotations:
    cert-manager.io/cluster-issuer: "minikube-ca"
spec:
  ingressClassName: nginx
  tls:
    - hosts:
        - oidcdemo.minikube
      secretName: oidcdemo.tls
  rules:
    - host: oidcdemo.minikube
      http:
        paths:
          - path: /
            pathType: Prefix
            backend:
              service:
                name: oidcdemo
                port:
                  name: http
We’re using our Custom Certificate Authority, like for keycloak.
We can access the interface accessing https://oidcdemo.minikube.
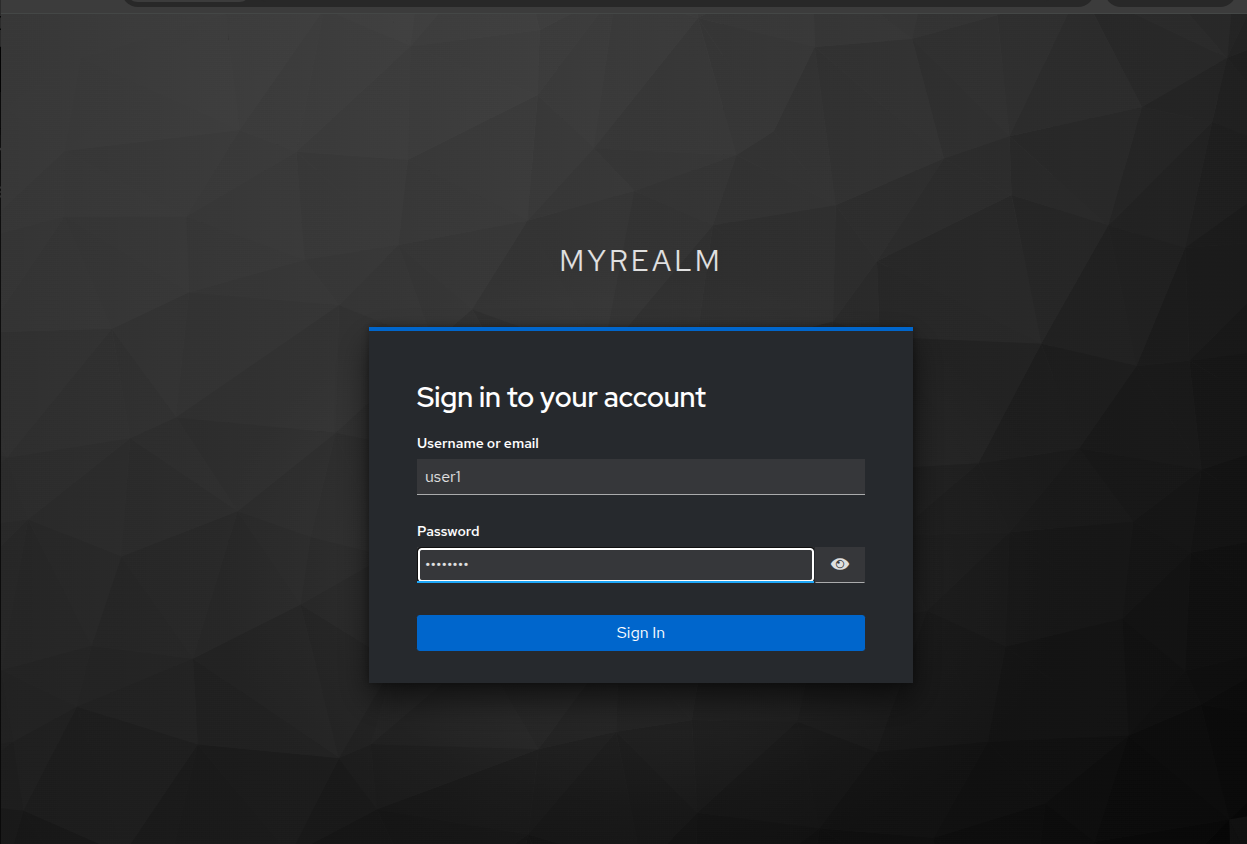
 If we press the Authenticate, we’ll be redirected to a keycloak login screen
for our realm.
If we press the Authenticate, we’ll be redirected to a keycloak login screen
for our realm.
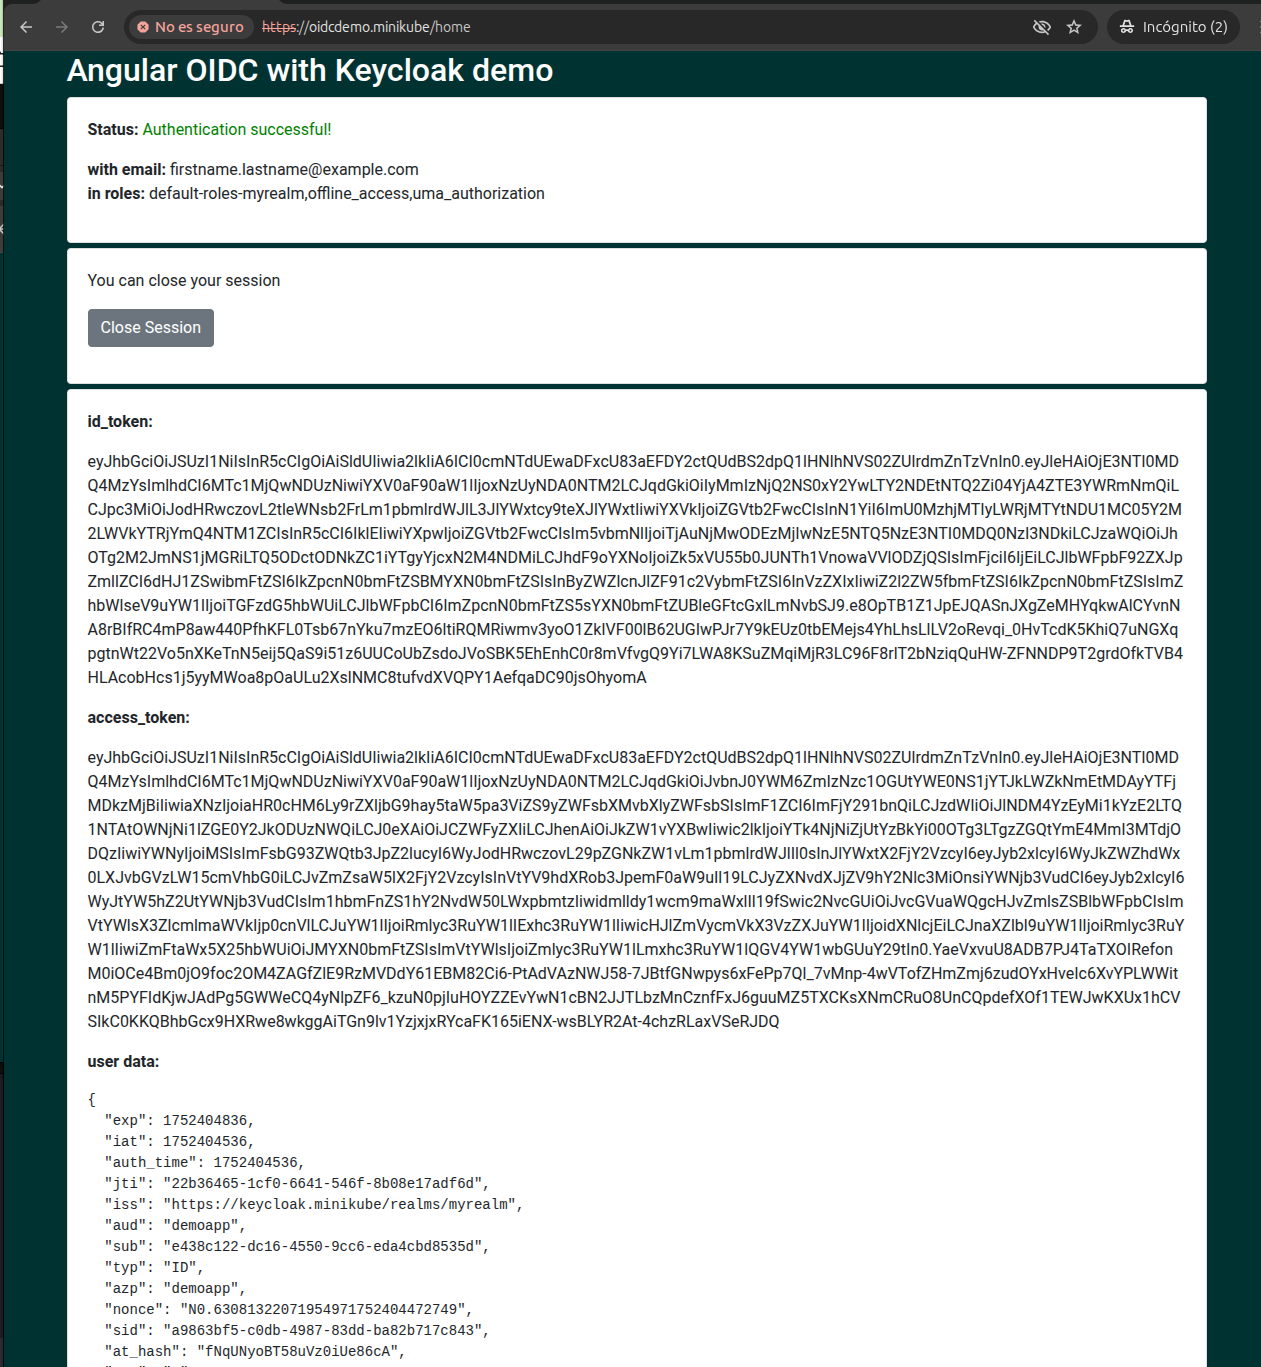
 After authenticating with the created user credentials we’ll be redirected to the
oidcdemo application and we’ll see the token and some user info.
After authenticating with the created user credentials we’ll be redirected to the
oidcdemo application and we’ll see the token and some user info.
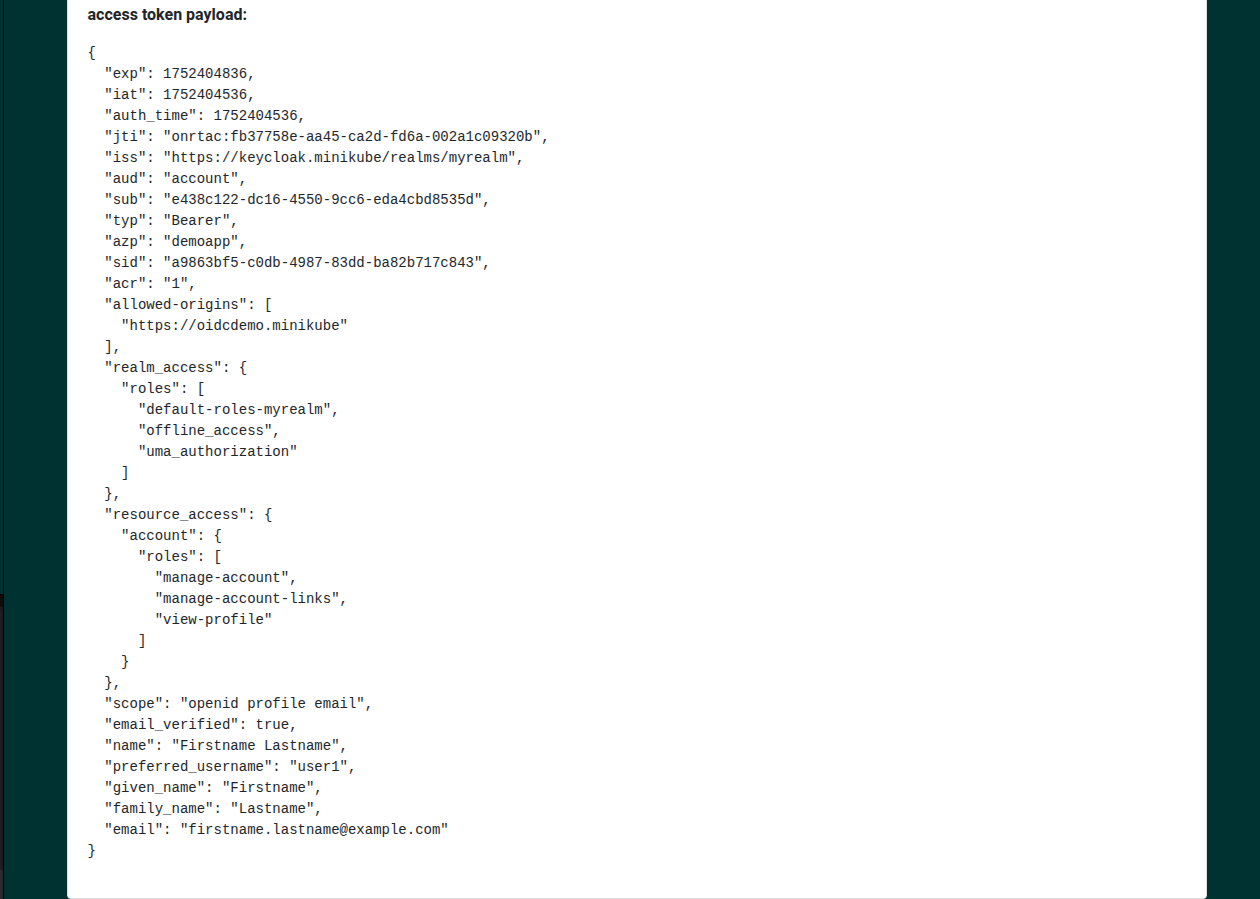
 If we scroll down, we can see some addinitonal data that can be used in our application
to create a user profile.
If we scroll down, we can see some addinitonal data that can be used in our application
to create a user profile.
Conclusion
In this post we have seen how to create a keycloak instance and how to set a simple OpenID Connect enabled application that uses keycloak as identity source.
Keycloak is the upstream project for Red Hat IdM, so it’s a reliable open source alternative to provide user authentication. It supports the most used standards like OpenID Connect, OAuth2 and SAML. Additionally it supports federating users from other sources like Active Directory or even integrate with social networks like github or google for authentication.
References
- Keycloak https://keycloak.io
- Cert-manager
- Easy-RSA
https://github.com/OpenVPN/easy-rsa
- Ingress DNS
https://minikube.sigs.k8s.io/docs/handbook/addons/ingress-dns/
- Files in my homelab repo
https://github.com/juanjo-vlc/homelab/tree/main/keycloak-demo