Testing Vmware Tanzu CE II
I decided to perform additional experiments with VMWare Tanzu, but unfortunately, tanzu clusters on docker didn’t survive reboots, so I had to create another cluster, this time a standalone cluster.
tanzu standalone-cluster create -i docker anthrax-wrkld
Everything seemed to work fine, but after creation, I tried to get the pods and kubectl complained because the certificates were wrong. I reused the name anthrax-wrkld from my previous test and my kubeconfig file turned into a mess, so I tried to clean it out without success, so I deleted the standalone cluster and created it again with other name:
juanjo@Anthrax ~ $ tanzu standalone-cluster delete anthrax-wrkld
Loading bootstrap cluster config for standalone cluster at '/home/juanjo/.config/tanzu/tkg/clusterconfigs/anthrax-wrkld.yaml'
no bootstrap cluster config found - using default config
Deleting standalone cluster 'anthrax-wrkld'. Are you sure? [y/N]: y

loading cluster config file at
Setting up cleanup cluster...
Installing providers to cleanup cluster...
Moving all Cluster API objects from bootstrap cluster to standalone cluster...
Waiting for the Cluster API objects to be ready after restore ...
Deleting standalone cluster...
Standalone cluster 'anthrax-wrkld' deleted.
Deleting the standalone cluster context from the kubeconfig file '/home/juanjo/.kube/config'

Standalone cluster deleted!
Removing temporary bootstrap cluster config for standalone cluster at '/home/juanjo/.config/tanzu/tkg/configs/anthrax-wrkld_ClusterConfig'
no bootstrap cluster config found - skipping
Removing temporary UI bootstrap cluster config for standalone cluster at '/home/juanjo/.config/tanzu/clusterconfigs/anthrax-wrkld.yaml'
no UI bootstrap cluster config found - skipping

juanjo@Anthrax ~ $ tanzu standalone-cluster create -i docker anthrax-standalone

Validating the pre-requisites...
Identity Provider not configured. Some authentication features won't work.

Setting up standalone cluster...
Validating configuration...
Using infrastructure provider docker:v0.3.23
Generating cluster configuration...
Setting up bootstrapper...
Bootstrapper created. Kubeconfig: /home/juanjo/.kube-tkg/tmp/config_KTC2Sa8U
Installing providers on bootstrapper...
Start creating standalone cluster...
Saving standalone cluster kubeconfig into /home/juanjo/.kube/config
Waiting for bootstrap cluster to get ready for save ...
Waiting for addons installation...
Moving all Cluster API objects from bootstrap cluster to standalone cluster...
Context set for standalone cluster anthrax-standalone as 'anthrax-standalone-admin@anthrax-standalone'.
Cleaning up unneeded resources (for standalone clusters)...

Standalone cluster created!


You can now use Kubectl to access your cluster:

  kubectl get pods -A


You can also delete the cluster by running the following:

  tanzu standalone-cluster delete [name]


Some addons might be getting installed! Check their status by running the following:

  kubectl get apps -A
There was still something wrong with my kubeconfig because setting context didn’t work for me, I had to manually edit it and set the anthrax-standalone-admin@anthrax-standalone context. But once I did it, I had full access to my kubernetes cluster.
The experiment.
While I was following the getting started guide last week, I discovered a docker montoring stack guide on tanzu’s documentation, so I wanted to give it a try.
That guide was about deploying prometheus and grafana using tanzu packages, and I though it was a great opportunity to learn a bit about them. As I recreated the cluster, I had to enable the repositories again:
$ tanzu package repository add tce-repo --url projects.registry.vmware.com/tce/main:0.9.1
/ Adding package repository 'tce-repo'...
 Added package repository 'tce-repo'
Installing MetalLB
One of the first steps was to install MetalLB, it was really something I was looking for, a way to provide LoadBalancer functionality to bare metal clusters. It also supports BGP for routing, but didn’t fancy deploying an elaborated network.
Its installation was easy, but at my first attempt didn’t understand correctly wat ips to use, and I used a range in my real network, I don’t recommend that, it’s better to use another private range.
$ kubectl apply -f https://raw.githubusercontent.com/metallb/metallb/v0.11.0/manifests/namespace.yaml
namespace/metallb-system created
$ kubectl apply -f https://raw.githubusercontent.com/metallb/metallb/v0.11.0/manifests/metallb.yaml
Warning: policy/v1beta1 PodSecurityPolicy is deprecated in v1.21+, unavailable in v1.25+
podsecuritypolicy.policy/controller created
podsecuritypolicy.policy/speaker created
serviceaccount/controller created
serviceaccount/speaker created
clusterrole.rbac.authorization.k8s.io/metallb-system:controller created
clusterrole.rbac.authorization.k8s.io/metallb-system:speaker created
role.rbac.authorization.k8s.io/config-watcher created
role.rbac.authorization.k8s.io/pod-lister created
role.rbac.authorization.k8s.io/controller created
clusterrolebinding.rbac.authorization.k8s.io/metallb-system:controller created
clusterrolebinding.rbac.authorization.k8s.io/metallb-system:speaker created
rolebinding.rbac.authorization.k8s.io/config-watcher created
rolebinding.rbac.authorization.k8s.io/pod-lister created
rolebinding.rbac.authorization.k8s.io/controller created
daemonset.apps/speaker created
deployment.apps/controller created
The configmap needs to be created by hand, so, starting with the basic example I made my configmap definition:
apiVersion: v1
kind: ConfigMap
metadata:
  namespace: metallb-system
  name: config
data:
  config: |
    address-pools:
    - name: default
      protocol: layer2
      addresses:
      - 192.168.240.240-192.168.240.255
Installing cert-manager
Cert Manager was required to provide certificates for the components of the solution, I installed it as described on the documentation.
$ tanzu package available list cert-manager.community.tanzu.vmware.com -n default
/ Retrieving package versions for cert-manager.community.tanzu.vmware.com...
  NAME                                     VERSION  RELEASED-AT
  cert-manager.community.tanzu.vmware.com  1.3.3    2021-08-06T12:31:21Z
  cert-manager.community.tanzu.vmware.com  1.4.4    2021-08-23T16:47:51Z
  cert-manager.community.tanzu.vmware.com  1.5.3    2021-08-23T17:22:51Z
$ tanzu package install cert-manager --package-name cert-manager.community.tanzu.vmware.com --version 1.5.3
/ Installing package 'cert-manager.community.tanzu.vmware.com'
| Getting namespace 'default'
| Getting package metadata for 'cert-manager.community.tanzu.vmware.com'
| Creating service account 'cert-manager-default-sa'
| Creating cluster admin role 'cert-manager-default-cluster-role'
| Creating cluster role binding 'cert-manager-default-cluster-rolebinding'
- Creating package resource
\ Package install status: Reconciling
Installing Contour
As stated on tanzu’s page:
Contour projectcontour.io provides this functionality via an Envoy Ingress controller. Contour is an open source Kubernetes Ingress controller that acts as a control plane for the Envoy edge and service proxy.
So, before installing I checked the available versions, in this case, there were a couple of versions released after the guide was wrote.
$ tanzu package available list contour.community.tanzu.vmware.com
/ Retrieving package versions for contour.community.tanzu.vmware.com...
  NAME                                VERSION  RELEASED-AT
  contour.community.tanzu.vmware.com  1.17.1   2021-07-23T18:00:00Z
  contour.community.tanzu.vmware.com  1.17.2   2021-07-23T18:00:00Z
  contour.community.tanzu.vmware.com  1.18.1   2021-07-23T18:00:00Z
In this case, there was nothing to add to the proposed contour-data-values.yaml file:
envoy:
  service:
    type: LoadBalancer
certificates:
  useCertManager: true
The installation was performed using the latest version available.
$ tanzu package install contour -p contour.community.tanzu.vmware.com --version 1.18.1 --values-file contour-data-values.yaml
/ Installing package 'contour.community.tanzu.vmware.com'
| Getting namespace 'default'
| Getting package metadata for 'contour.community.tanzu.vmware.com'
| Creating service account 'contour-default-sa'
| Creating cluster admin role 'contour-default-cluster-role'
| Creating cluster role binding 'contour-default-cluster-rolebinding'
| Creating secret 'contour-default-values'
- Creating package resource
- Package install status: Reconciling

 Added installed package 'contour' in namespace 'default'
At this point the guide suggested to use the kubectl port forwarding feature to access the envoy page, I tried but got a “404 not found” on /, but I tried /stats and got results, so I didn’t worried too much.
Installing local-path-storage package
Then I installed the local-path-storage package, which provides the local-path storage class, allowing the dynamic reservation of hostPath PV.
 $ tanzu package install local-path-storage -p local-path-storage.community.tanzu.vmware.com -v 0.0.20

This package will provide a StorageClass
 $ kubectl get storageclasses
NAME                   PROVISIONER             RECLAIMPOLICY   VOLUMEBINDINGMODE      ALLOWVOLUMEEXPANSION   AGE
local-path (default)   rancher.io/local-path   Delete          WaitForFirstConsumer   false                  2m
Installing prometheus
Prometheus is a metrics aggregator and collector, and it has a little alerting and graphing capability, but grafana is better at this.
I only changed the virtual_host_fqdn field from the proposed configuration.
ingress:
  enabled: true
  virtual_host_fqdn: "prometheus.garmo.local"
  prometheus_prefix: "/"
  alertmanager_prefix: "/alertmanager/"
  prometheusServicePort: 80
  alertmanagerServicePort: 80
And installed the only version available.
$ tanzu package install prometheus -p prometheus.community.tanzu.vmware.com -v 2.27.0 --values-file prometheus-data-values.yaml
/ Installing package 'prometheus.community.tanzu.vmware.com'
| Getting namespace 'default'
| Getting package metadata for 'prometheus.community.tanzu.vmware.com'
| Creating service account 'prometheus-default-sa'
| Creating cluster admin role 'prometheus-default-cluster-role'
| Creating cluster role binding 'prometheus-default-cluster-rolebinding'
| Creating secret 'prometheus-default-values'
- Creating package resource
\ Package install status: Reconciling

 Added installed package 'prometheus' in namespace 'default'
Again, the guide suggested port forwarding to check prometheus’ UI.
Installing grafana
I also changed the virtual_host_fqdn on the configuration file:
ingress:
  virtual_host_fqdn: "grafana.garmo.local"
Again there was only one version to install:
$ tanzu package install grafana --package-name grafana.community.tanzu.vmware.com --version 7.5.7 --values-file grafana-data-values.yaml
- Installing package 'grafana.community.tanzu.vmware.com'
| Getting namespace 'default'
| Getting package metadata for 'grafana.community.tanzu.vmware.com'
| Creating service account 'grafana-default-sa'
| Creating cluster admin role 'grafana-default-cluster-role'
| Creating cluster role binding 'grafana-default-cluster-rolebinding'
| Creating secret 'grafana-default-values'
- Creating package resource
| Package install status: Reconciling


 Added installed package 'grafana' in namespace 'default'
And once again, accessing grafana was suggested to be done by port forwarding.
Accessing the proxyed services
We started the process installing MetalLB and Contour, but following the guide I didn’t use the ingresses at all. The author said that Docker on Mac computers didn’t allow it, but he didn’t offer a way to use it.
The only way I’ve found to access the deployed HTTPproxy is to manually route the traffic for the MetalLB assigned segment through the corresponding bridge.
First I got the network gateway for the kind network, the one created by tanzu:
$ docker network inspect kind -f "{{ (index .IPAM.Config 0).Gateway }}"
172.21.0.1
Then I looked for the bridge who has that address:
$ ip a l |grep 172.21.0.1 -B 2
11: br-71a5ae618431: <BROADCAST,MULTICAST,UP,LOWER_UP> mtu 1500 qdisc noqueue state UP group default
    link/ether 02:42:02:3d:4b:4d brd ff:ff:ff:ff:ff:ff
    inet 172.21.0.1/16 brd 172.21.255.255 scope global br-71a5ae618431
The next step was to force the selected IP range to go through that bridge:
$ sudo ip route add 192.168.240.240/28 via 172.21.0.1 dev br-71a5ae618431
Then I had to find the address for my envoy service, usually the first of the provided range:
$ kubectl get services -n projectcontour envoy
NAME    TYPE           CLUSTER-IP       EXTERNAL-IP       PORT(S)                      AGE
envoy   LoadBalancer   100.68.194.147   192.168.240.240   80:32761/TCP,443:31419/TCP   168m
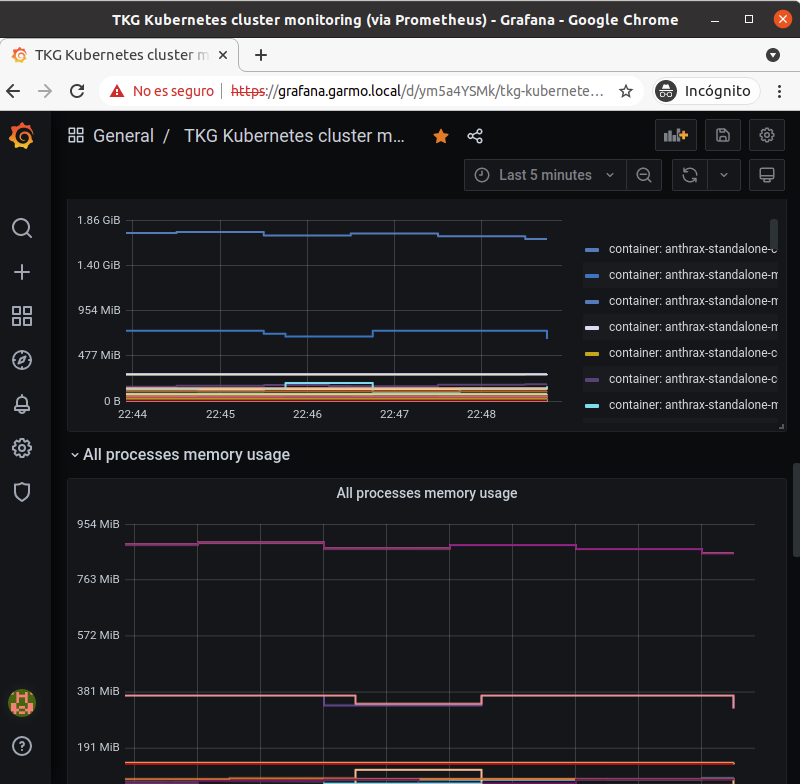
And, after pointing my selected virtual_host_name for grafana and prometheus to that ip on my hosts file I was able to access them through my browser:
192.168.240.240 grafana.garmo.local prometheus.garmo.local
Conclusion
Tanzu packages are a very straightforward way of deploying apps on kubernetes clusters, but, for the Community Edition, there aren’t a lot of them.
Helm is extensively used and have a lot of ready to deploy applications, and it’s compatible with all kubernetes providers, while tanzu packages are only for VMWare provided k8s, so this is not a competitor to Helm.
But for me, the most interesting things I discovered were MetalLB and Contour, but there is still a lot more to discover.
References
https://tanzucommunityedition.io/docs/latest/docker-monitoring-stack/ https://metallb.universe.tf/installation/#installation-by-manifest https://projectcontour.io/